Setup
Spatial Experience SDK Setup
System Requirements
- Tested Unity versions: 6000.3.22f1
- Stable internet connection
Get the Spatial Experience SDK
To download the Spatial Experience SDK, you have to use Unity’s built-in package manager (UPM). You will need to configure your NPM credentials and add our scoped registry, as described below.
Step 1: Setup your NPM Credentials
The following steps are necessary to setup your NPM credentials:
Log in via terminal: Type the following line into your terminal:
npm login --registry https://npm.pkg.holoride.com/repository/npm-external/ --auth-type=legacyYou will be requested to insert your username and password.
Retrieve your auth token: Now NPM has created a token for you to access the NPM server. This is saved in your local
.npmrcfile:- Windows/macOS/Linux:
%USERPROFILE%\.npmrc(or~/.npmrc)
Open this file and detect the token using the string value after
_authToken=.- Windows/macOS/Linux:
Configure Unity Package Manager: This token needs to be set for the Unity package manager. Under Windows, you need to either edit the following file, or create it:
- Path:
%USERPROFILE%\.upmconfig.toml
Add the following section to
.upmconfig.toml:[npmAuth."https://npm.pkg.holoride.com/repository/npm-external/"] token = "HERE THE TOKEN FROM THE .NPMRC FILE" alwaysAuth = true- Path:
Step 2: Add Scoped Registries in Unity
Add the necessary registries as a scoped registry in the Unity Package Manager.
To do this, open Unity and navigate to Project Settings > Package Manager and add the following scoped registry:
| Label | Entry |
|---|---|
| Name | holoride |
| URL | https://npm.pkg.holoride.com/repository/npm-external |
| Scope(s) | com.holoride |
- Add a new line with the '+' button to insert the scopes separately.
- Ensure there are no white spaces at the end of any of the fields.
Since we have a dependency to xNode and Unitask we also need to add these dependencies. We can do this via OpenUPM which is another scoped registry:
| Label | Entry |
|---|---|
| Name | OpenUPM |
| URL | https://package.openupm.com |
| Scope(s) | com.github.siccity.xnode com.cysharp.unitask |
Step 3: Install the Package
Now you can install the Spatial Experience SDK from the Package Manager window. Choose Packages: My Registries in the top bar. The Spatial Experience SDK can now be selected in the list and installed by clicking the button on the bottom.
Enable your Unity project
To enable your Unity Project to be used with the Spatial Experience SDK, you need to link a holoride manifest file (HMF) specifically created for your project. Please contact us at technology@holoride.com to obtain a manifest file.
Changing the Build Target
Because the SDK is designed to deploy onto mobile devices, you should configure your active build platform to Android before validation checks:
- Open Unity's build settings under File > Build Settings.
- Select Android from the Platform list.
- Click Switch Platform and wait for the compilation to complete.
Validate Your Project
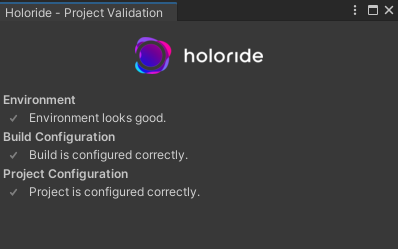
After successfully importing the Spatial Experience SDK package with all its dependencies, see the holoride Project Validation window to set up your project and fix all points on the list that show an exclamation mark (Check the Inspector when clicking Select). You can also find it the main menu under holoride > Project Validation, if you accidentally closed it.
You can update the Spatial Experience SDK from the Unity Package Manager window whenever a new version is available.