Creating a Simple Scene
This step-by-step tutorial will guide you through instantiating and configuring a minimalistic, fully working scene in Unity using the Spatial Experience SDK.
Step-by-Step Implementation
Step 1: Create a New Scene
- Create a new, empty scene in Unity and name it according to your project's naming conventions.
Step 2: Add the Vehicle Prefab
- Right-click inside Unity's Hierarchy window.
- Navigate to holoride > Vehicle and click to instantiate the core vehicle tracking prefab.
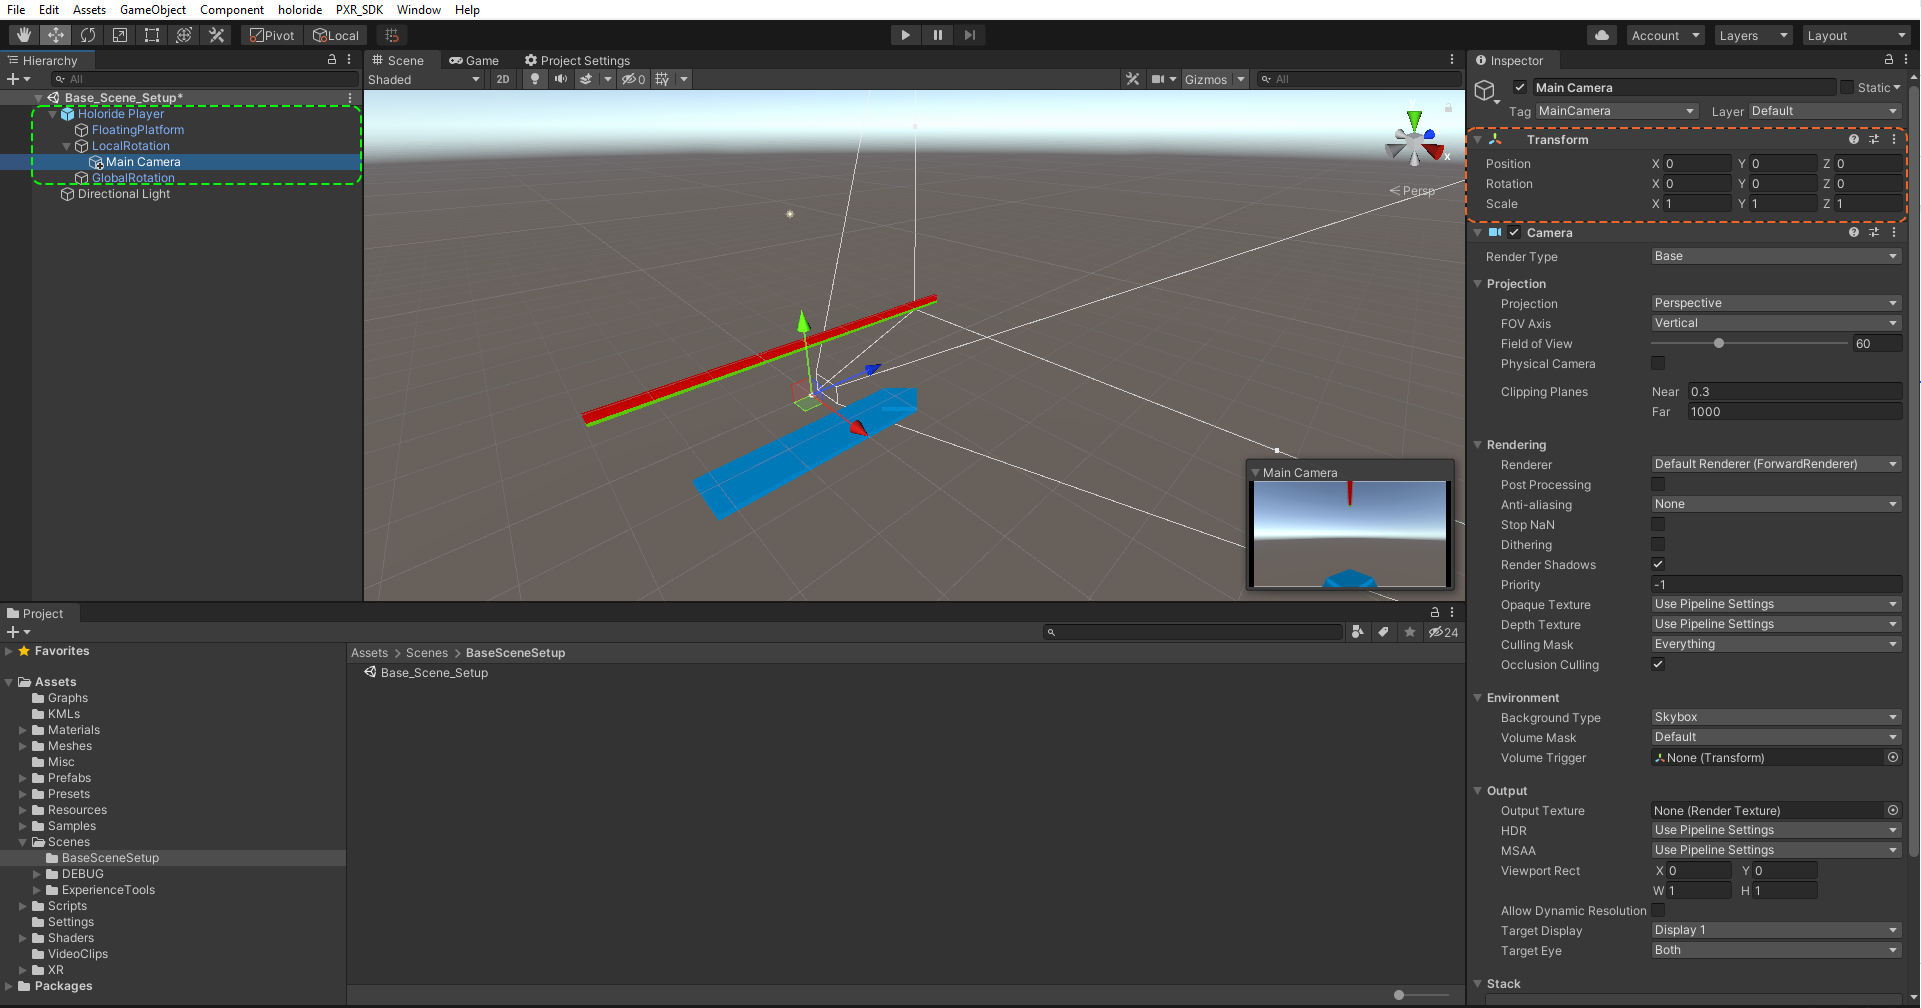
Step 3: Configure the Main Camera
- Locate the Vehicle game object you just added in the Hierarchy.
- Locate the nested child game object: CameraRigParent.
- Drag your scene's Main Camera and place it as a nested child under
CameraRigParent. - Select the Main Camera and zero out its Position and Rotation transforms (ensuring scale remains set to
1, 1, 1). - Note: If your camera has a legacy Simple Camera Controller component attached to it, remove it to prevent tracking conflicts.
Step 4: Add the Elastic Scene Generator (ESG)
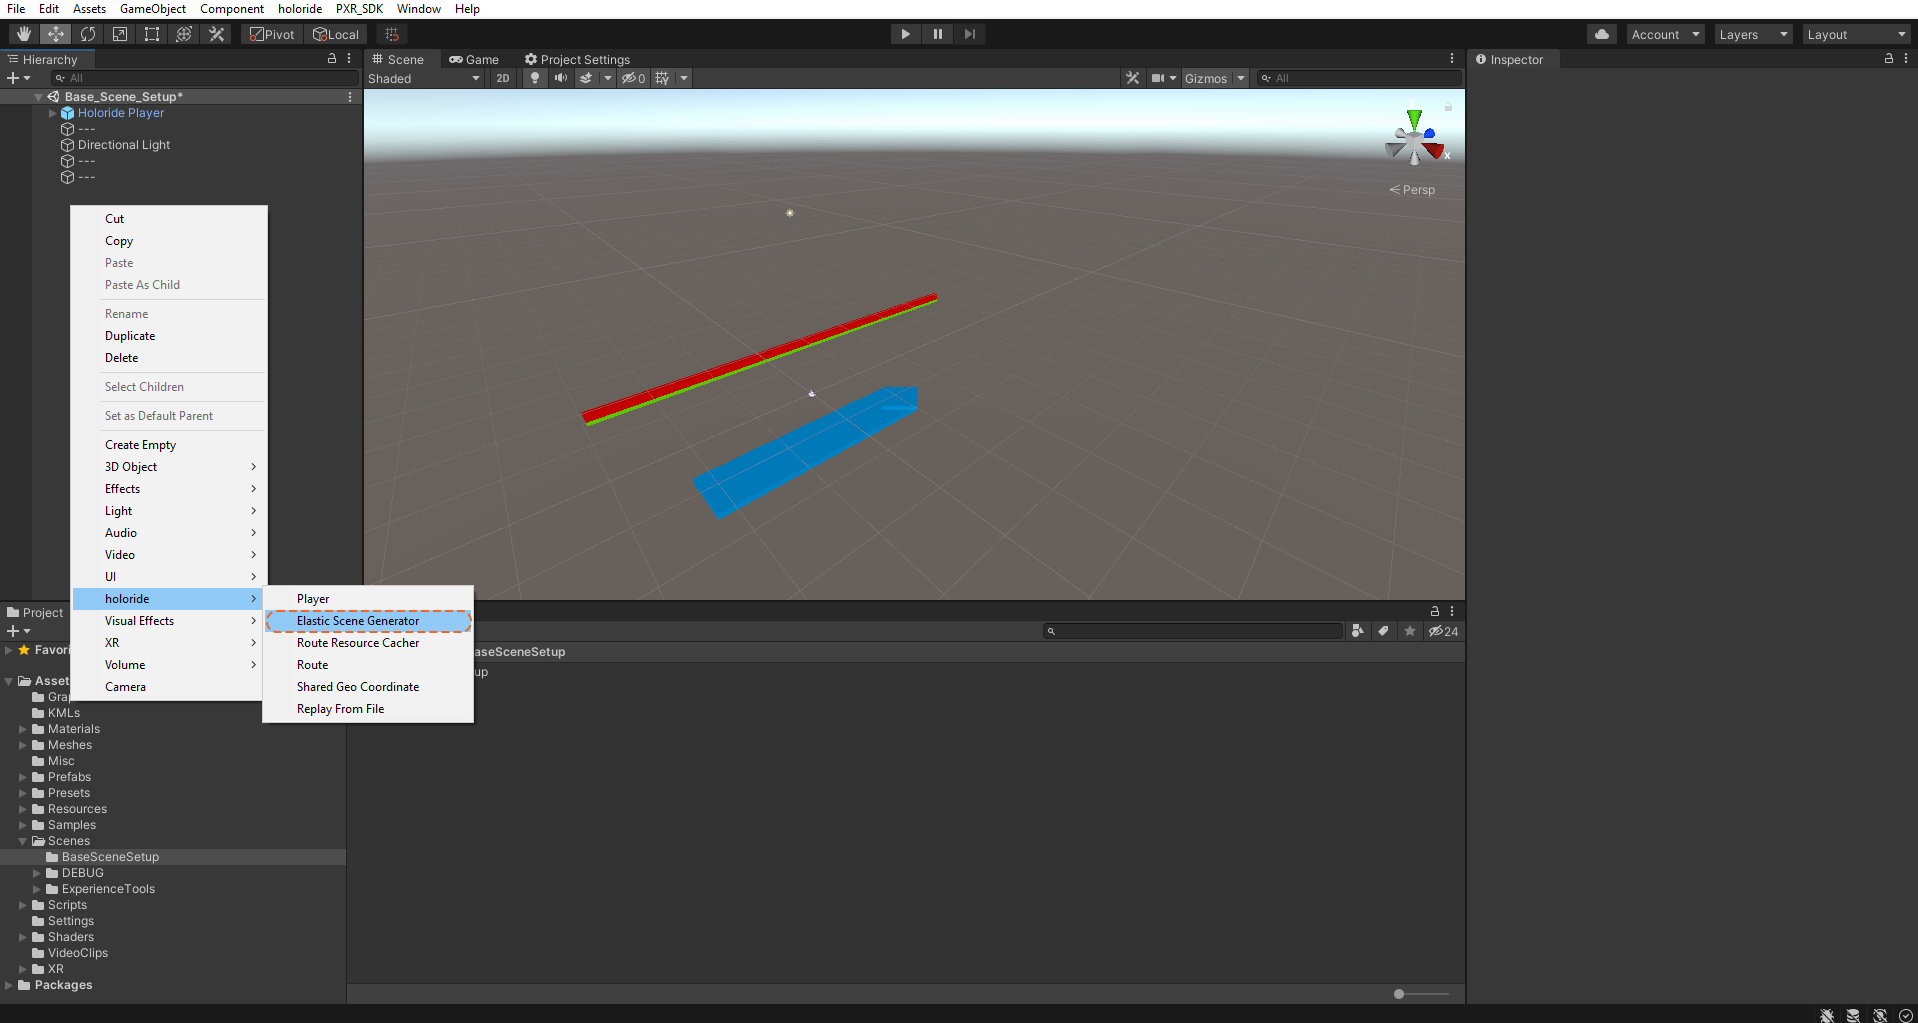
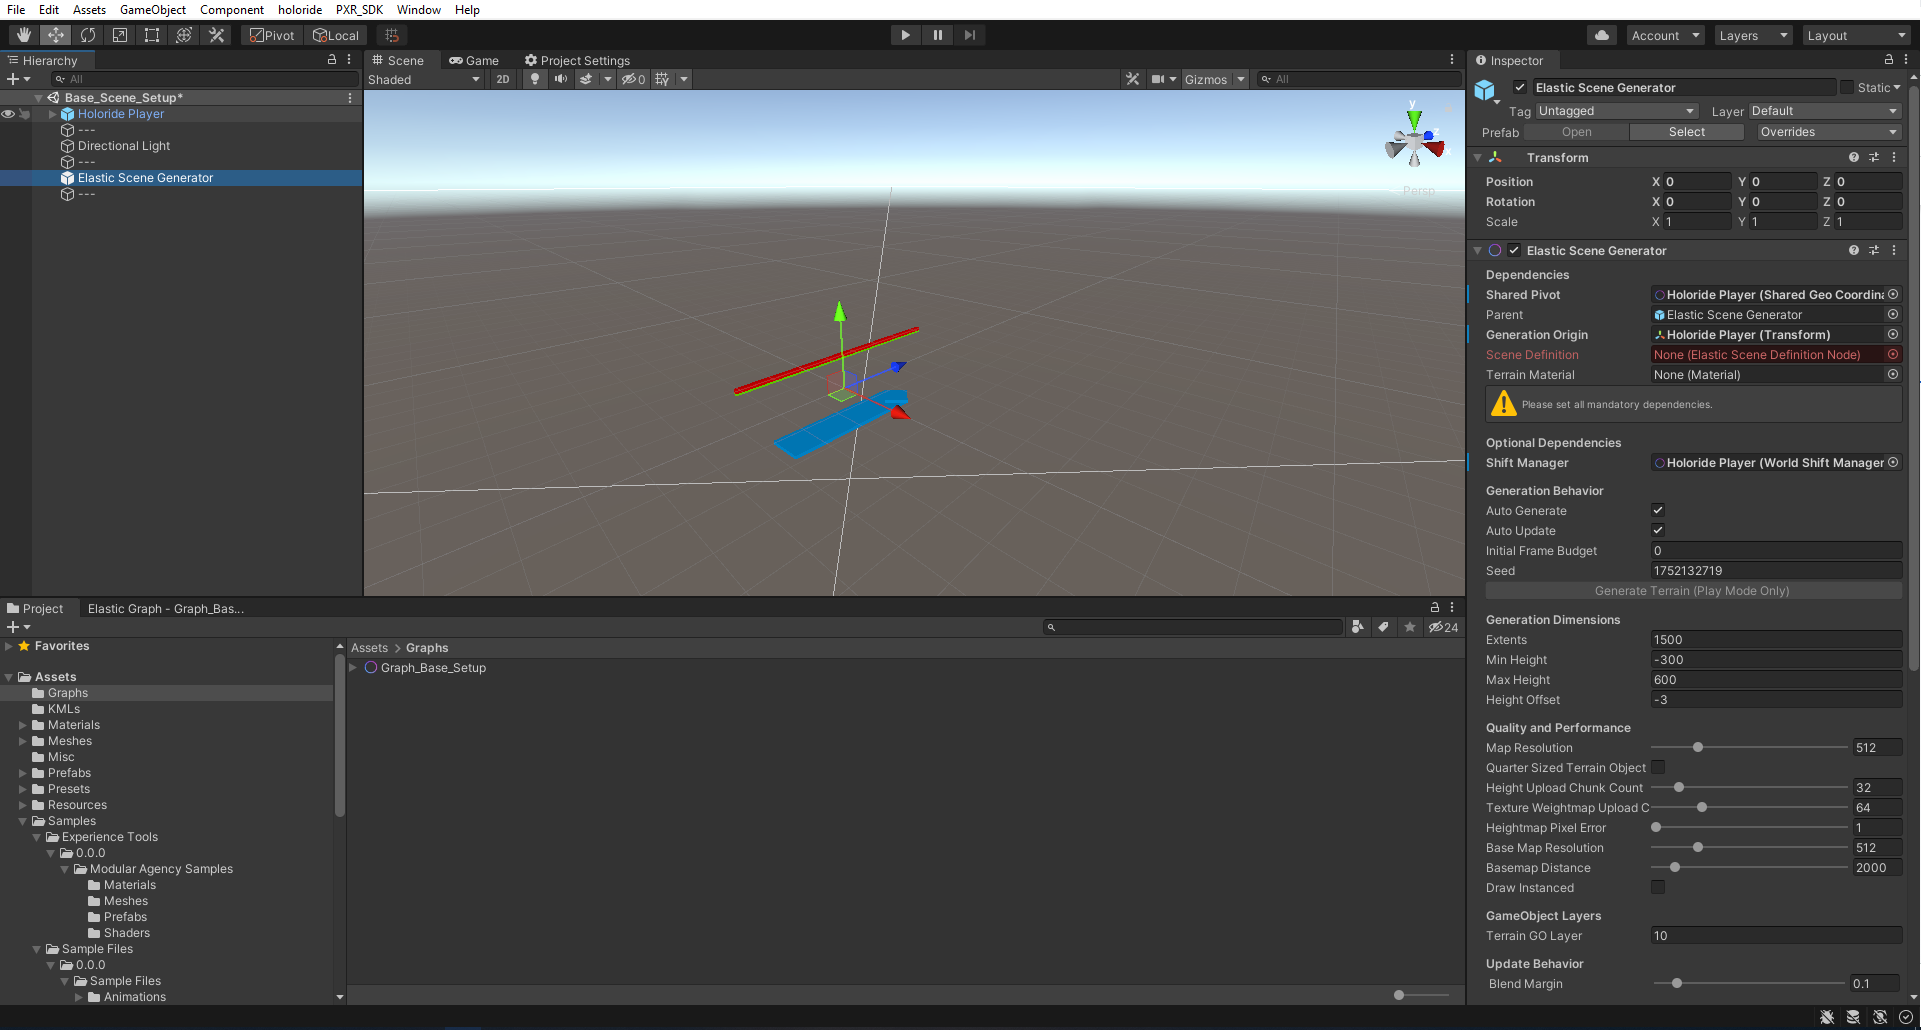
- Right-click inside your Hierarchy window.
- Select holoride > Elastic Scene Generator to instantiate the core runtime generation pipeline controller.
Step 5: Create an Elastic Graph Asset
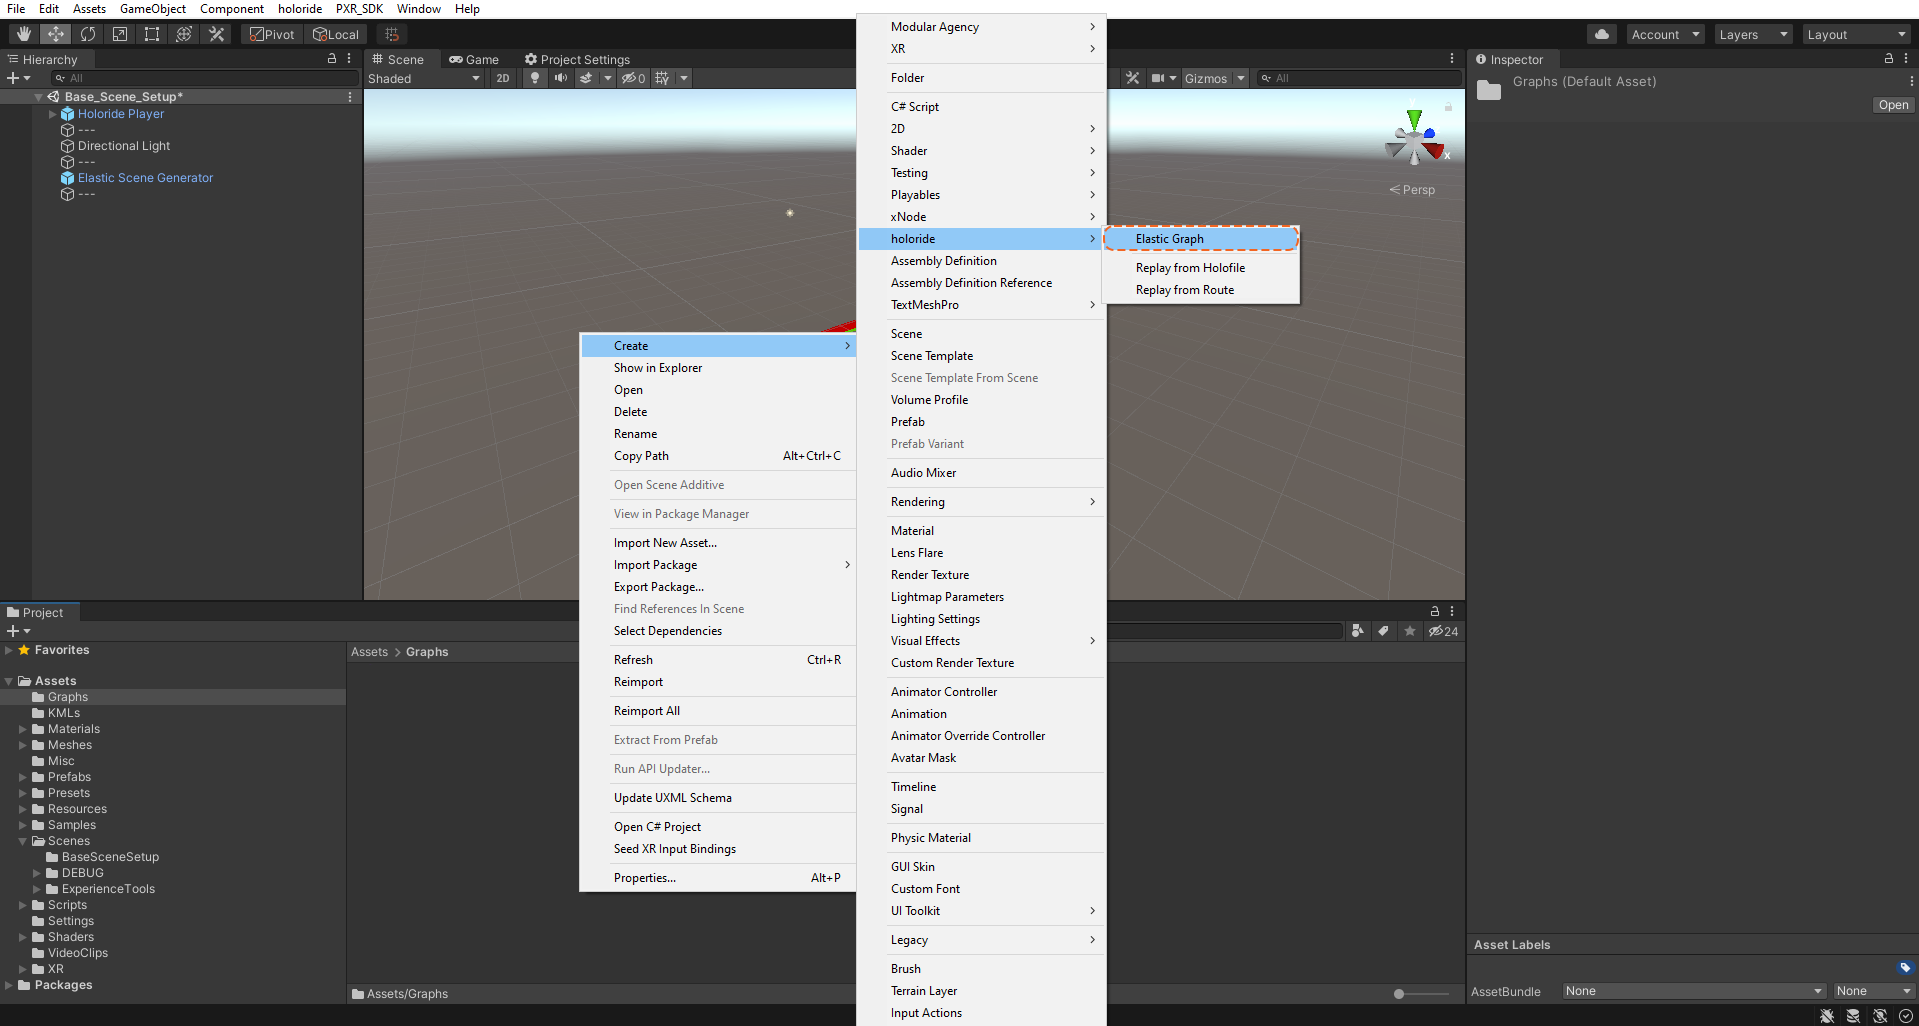
- In Unity's Project window, right-click inside your assets folder.
- Select Create > holoride > Elastic Graph to compile a new graph asset.
Step 6: Name Your Graph
- Rename the newly created graph asset to a clear, recognizable identifier.
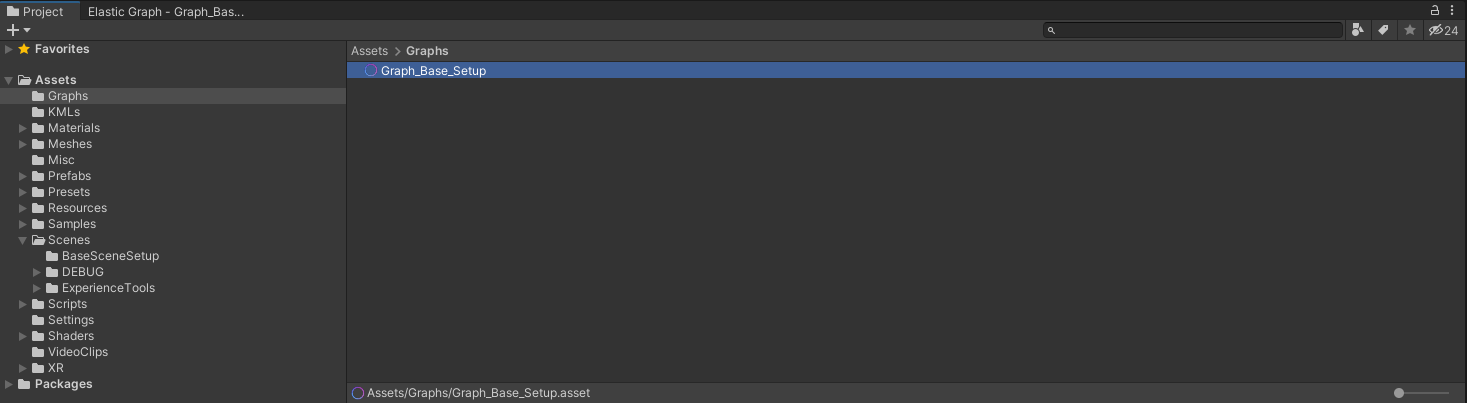
Step 7: Open the Graph Editor
- Double-click your renamed Elastic Graph asset to open the node graph visual editor.
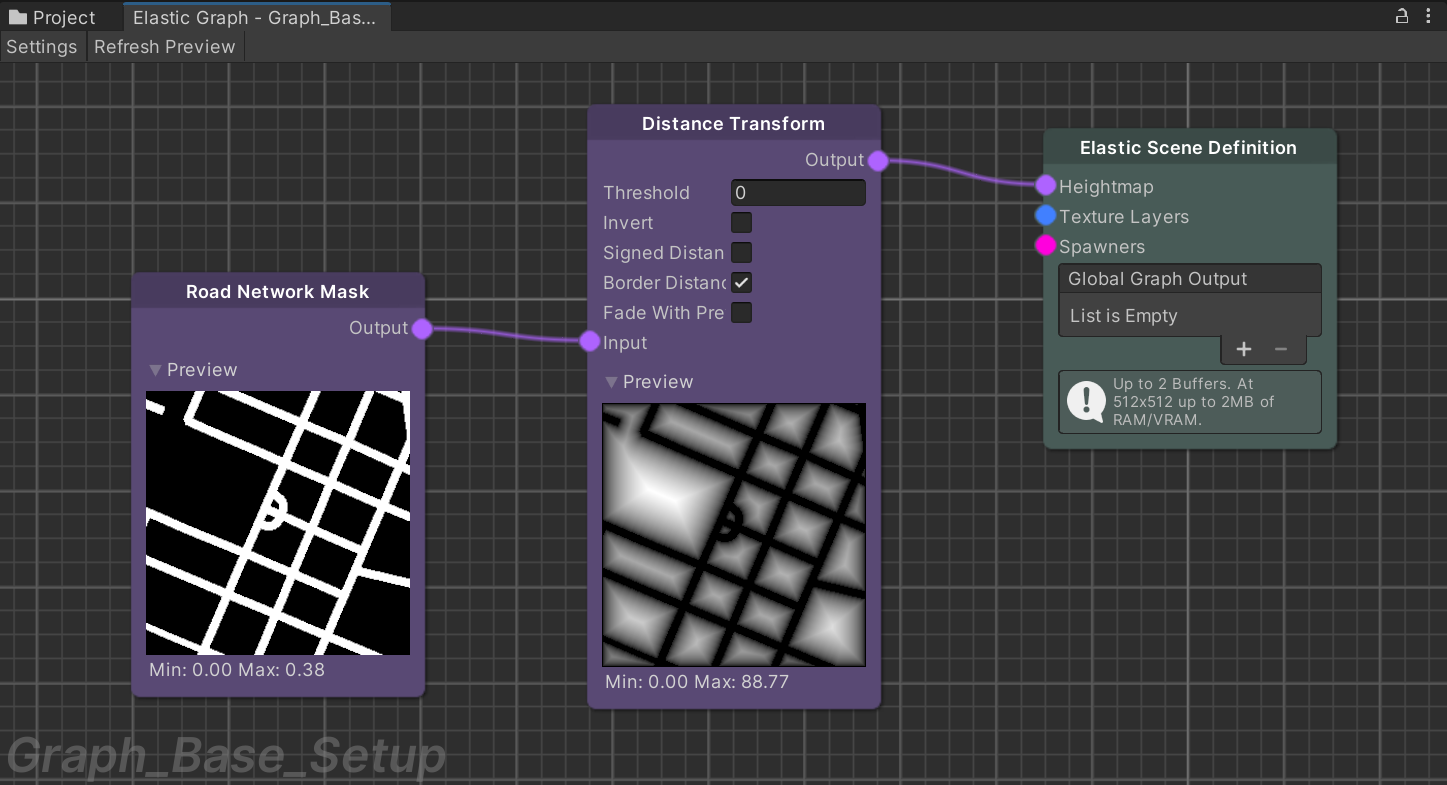
Step 8: Assemble the Node Network
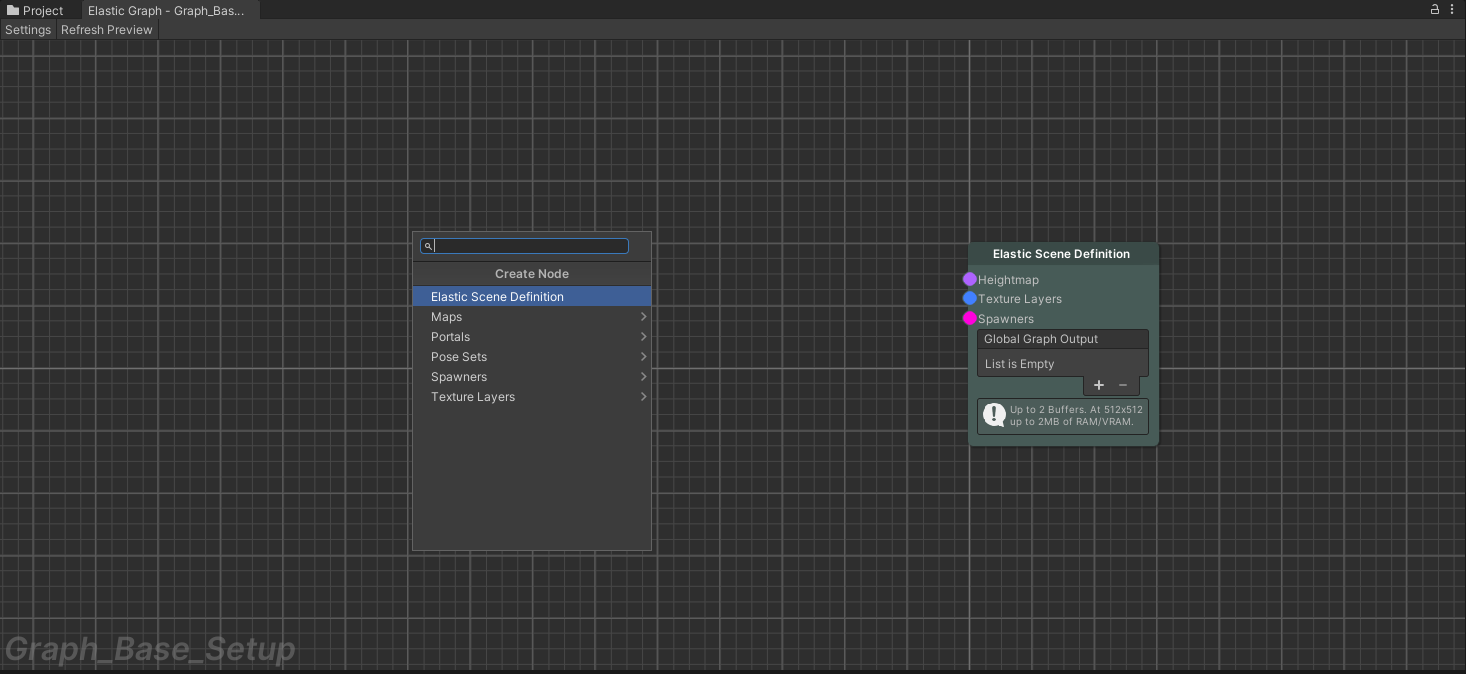
- Inside the Elastic Graph canvas, press the spacebar or right-click to open the creation context menu.
- Search and add the following nodes, connecting their ports in the exact order and setting the parameters shown below:
Step 9: Reference the Graph in the ESG
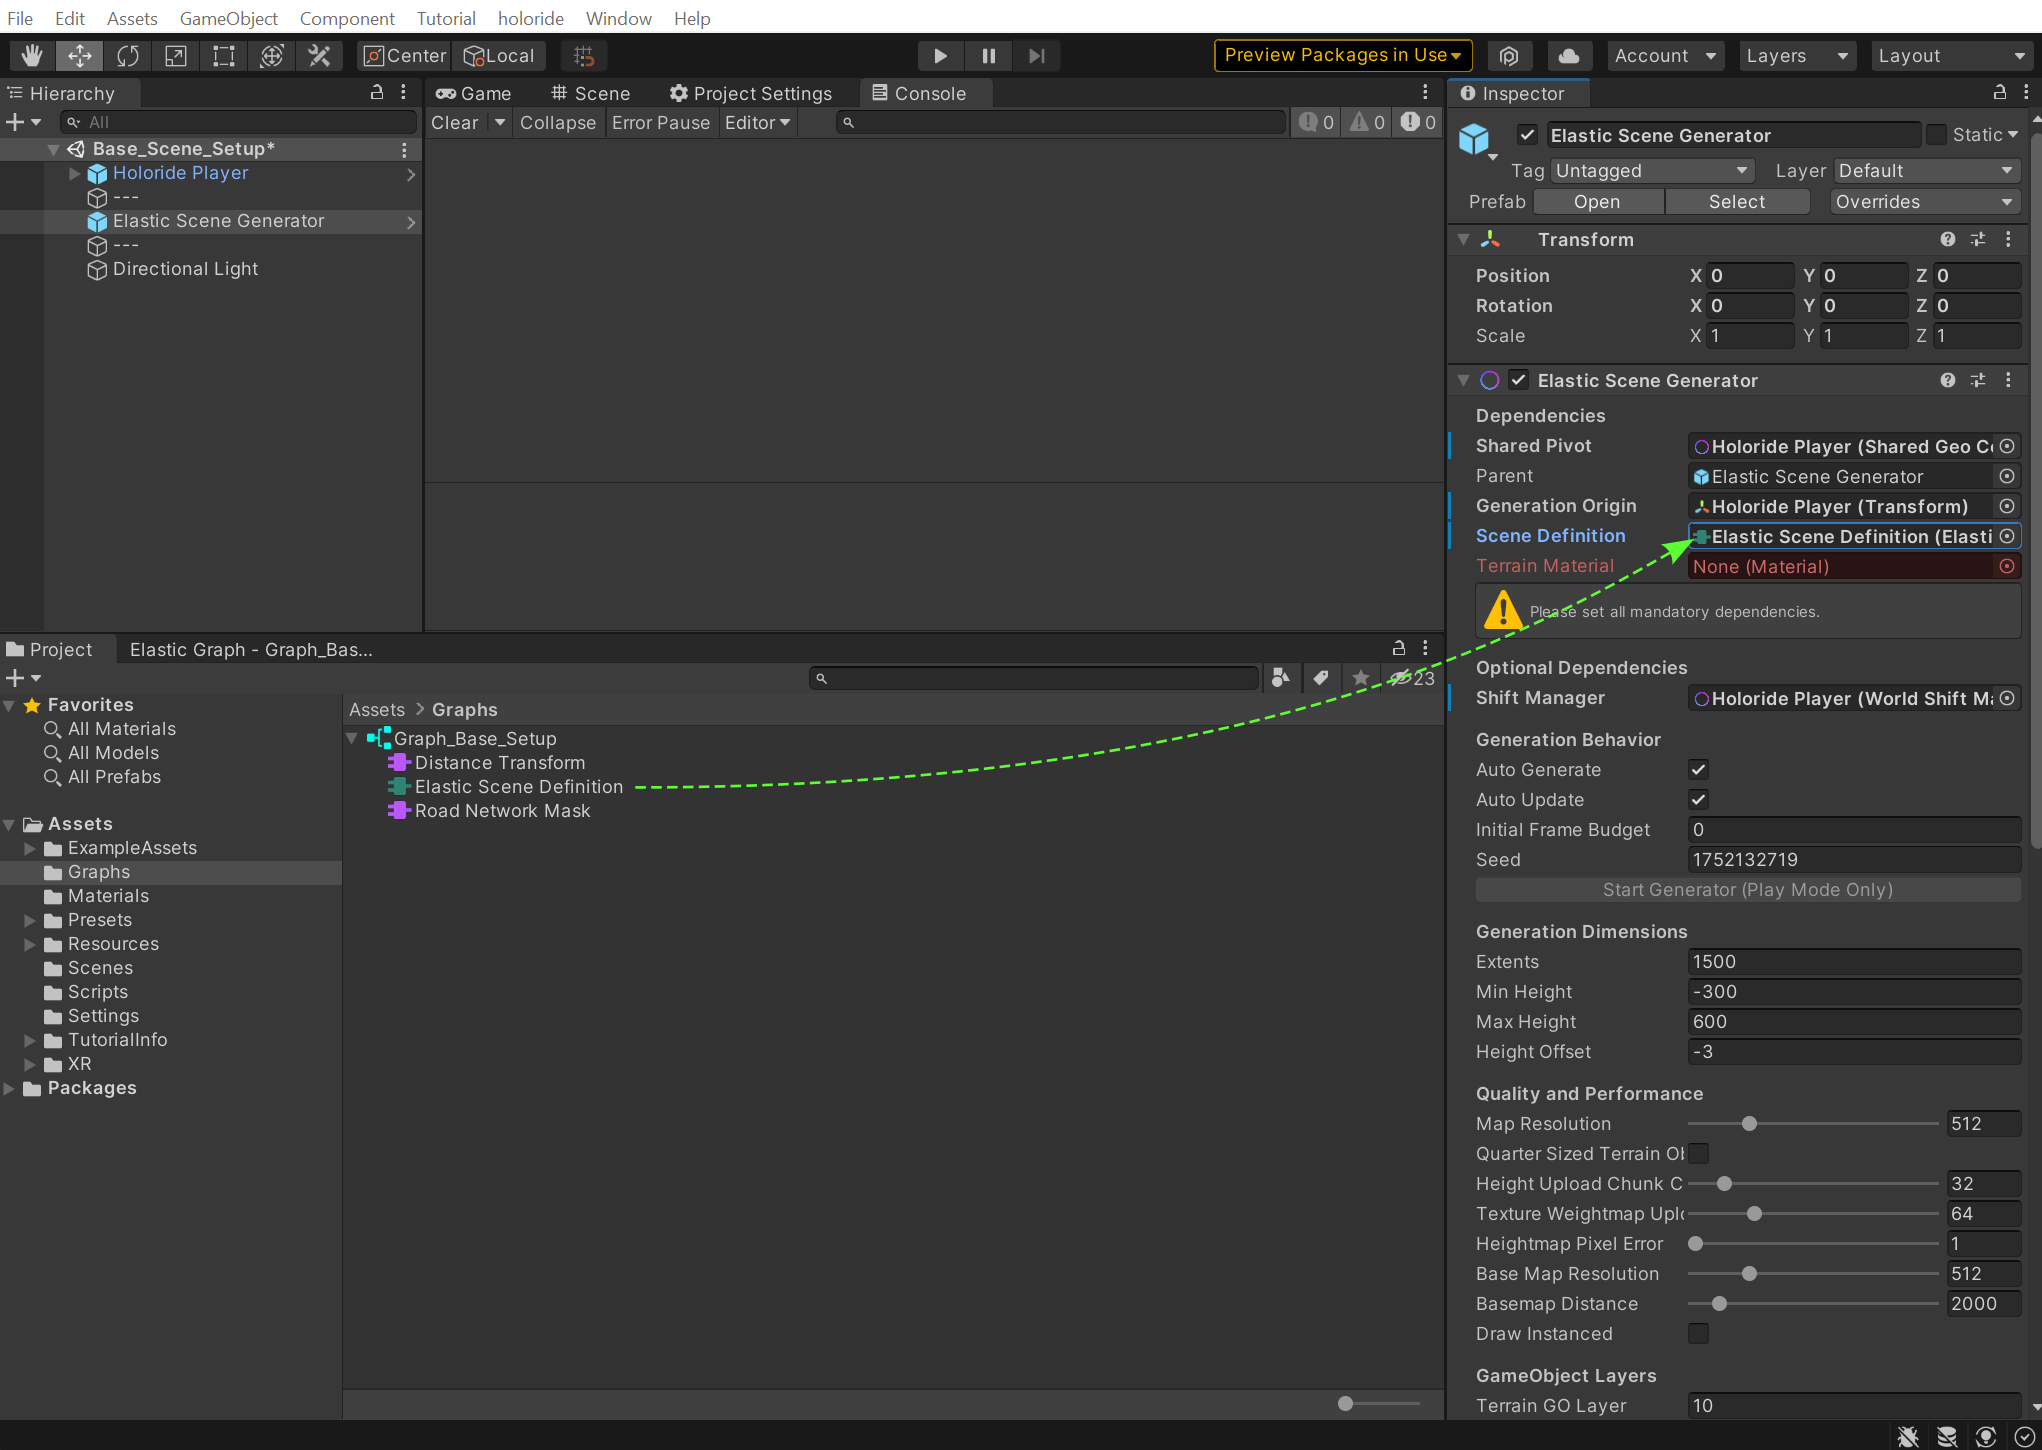
- Expand your Elastic Graph asset in the Project window to expose its nested Elastic Scene Definition sub-asset.
- Select the Elastic Scene Generator GameObject in your scene hierarchy.
- Drag the Elastic Scene Definition sub-asset directly into the Scene Definition inspector reference field on the ESG component.
Step 10: Validate in Play Mode
- Click Play in the Unity Editor to watch the maps pipeline download data and procedurally generate a simple, beautiful elastic terrain around your vehicle!
